The lab NAS serves a first backup destination for all the data produced in the lab. In particular, we have two types of data:
- auto-generated data, i.e. data generated by machines such as ethoscopes or DAMs
- user-generated data, i.e. data generated by lab members. These can be raw data (confocal images, gel scans etc) or processed data (powerpoint and XLS files, R scripts, etc.)
Both will have to be backed up on the NAS, although through different routes. This guide is intended for lab users and it covers how to back up user-generated data.
Contents
Get a NAS account.
As soon as you join the lab, you will be given a NAS account. If you do not know what your credentials are, ask Giorgio.
Setup the sync service: Windows users.
The easiest way to sync data in Windows is to install the Qsync client. This can be downloaded from here and setting it up should be self-explanatory. During the installation, you will be asked to provide the NAS details. They should be as follows:
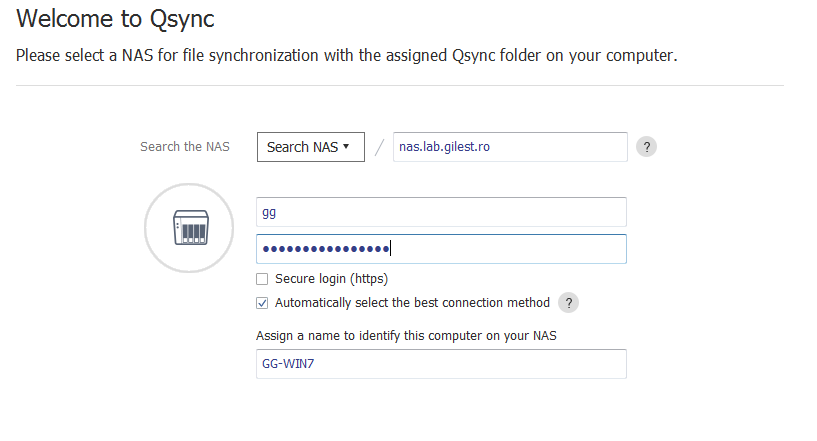 The NAS address is `nas.lab.gilest.ro` and the credentials are your own NAS credentials. The field in the bottom specifies the name of your own computer. You can install the Qsync client on all of your computers if you like.
After setting up the NAS details, you will have to choose which folders you will have to sync. By default, four folders will be offered to you.
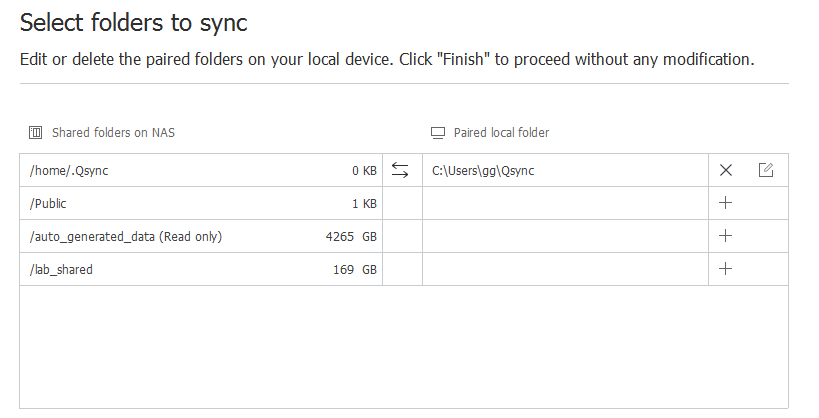
The first folder (Qsync) is the one where all your user-generated data should go. All your powerpoints, xls, word files, confocal images etc should be under that folder. If they already live somewhere else, you can change the location of the Qsync folder to where they are (e.g C:\Users\<your_name>\Work_data). The other three folders are read-only folders that leave on the NAS. It is recommended not to sync those.
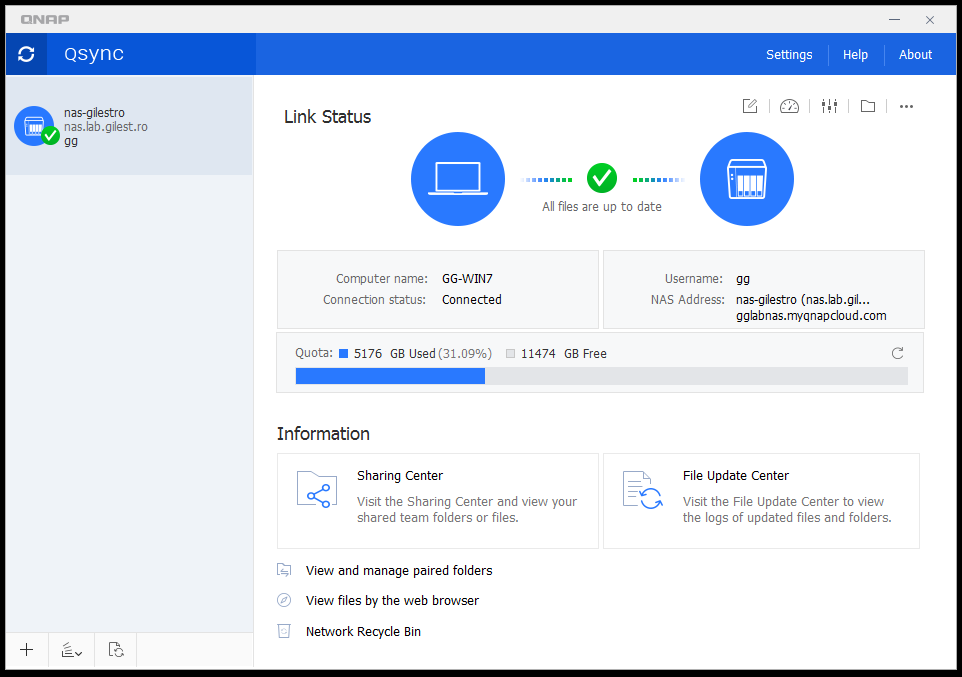
That's it. Once the client is up and running, every file that goes into the Qsync folder will be automatically be transferred to the NAS, in a hidden subfolder of your home directory. You do not have to worry about where the files go on the NAS.
Setup the sync service: Linux users
QNAP support for Linux is not as straightforward as it is for Windows. Unfortunately, there is not an out-of-the-box Qsync alternative. The following procedure should work equally well.
Create a mount point for your remote NAS home folder. This is best done in your local home directory. For instance:
mkdir ~/.myNAS
The dot in front of the folder name means that the folder will normally be not visible by your browser. This is the desired behaviour.
Using a text editor, create a text file holding your NAS credentials and save it in your home folder with name .nas_credentials
username=your_nas_username
password=your_nas_password
Make sure that you can mount your remote NAS home to your local mount point:
sudo mount -t cifs //nas.lab.gilest.ro/homes/<your_NAS_username> ~/.myNAS -o sec=ntlm,uid=<your_linux_username>,credentials=/home<your_linux_username>/.nas_creds
Your remote NAS home should now be mounted locally. Check by listing the content of to the mount point (ls ~/.myNAS). If this worked, you can safely add the following lines to your `/etc/fstab` file:
#nas
//nas.lab.gilest.ro/auto_generated_data /home/gg/auto_generated_data cifs users,sec=ntlm,ro,auto,x-systemd.automount,nofail,credentials=/home/<username>/.nas_creds 0 0
//nas.lab.gilest.ro/lab_shared /home/<username>/lab_shared cifs users,sec=ntlm,rw,auto,x-systemd.automount,nofail,credentials=/home/<username>/.nas_creds 0 0
//nas.lab.gilest.ro/homes/<NAS_username> /home/<username>/.myNAS cifs users,sec=ntlm,rw,noauto,x-systemd.automount,nofail,uid=<username>,gid=users,credentials=/home/gg/.nas_creds 0 0
In the above lines, replace <username> with your local Linux username and NAS_username with your remote NAS username. These may or may not be the same, depending on what you picked!
Note that the first two lines will mount also the other two common folders. You will need to create a mount point for them too.
Optionally, you can create a daemon that will automatically sync your local folder with the remote folder. To do this, do the following:
1. Make sure you have the inotifytools installed
2. Create and save the following file somewhere on your computer (e.g. /opt/NASsync/nassync.sh)
#!/bin/bash
EVENTS="CREATE,DELETE,MODIFY,MOVED_FROM,MOVED_TO"
LOCAL_DATA_FOLDER=/home/<username>/myData
NAS_MOUNT_POINT=/home/<username>/.myNAS

sync() {
  mountpoint -q $NAS_MOUNT_POINT && rsync --update -alvzr --exclude '*cache*' --exclude '*.git*' $LOCAL_DATA_FOLDER $NAS_MOUNT_POINT
}

watch() {
  inotifywait -e "$EVENTS" -m -r --format '%:e %f' $LOCAL_DATA_FOLDER
}


watch | (
while true ; do
  read -t 1 LINE && sync
done
)
3. Create a file called sync.service in the directory /etc/systemd/system/ and put the following contents in it:
[Unit]
Description = SyncService
After = network.target

[Service]
PIDFile = /var/run/syncservice/syncservice.pid
User = root
Group = root
WorkingDirectory = /opt/NASsync
ExecStartPre = /bin/mkdir /var/run/syncservice
ExecStartPre = /bin/chown -R root:root /var/run/syncservice
ExecStart = /bin/bash /opt/NASsync/nassync.sh
ExecReload = /bin/kill -s HUP $MAINPID
ExecStop = /bin/kill -s TERM $MAINPID
ExecStopPost = /bin/rm -rf /var/run/syncservice
PrivateTmp = true

[Install]
WantedBy = multi-user.target
4. Chmod this service file and reload the systemd daemon:
chmod 755 /etc/systemd/system/sync.service
systemctl daemon-reload
You are all set! You can now use these commands to manage your self-made directory sync daemon:
# Start your service
systemctl start sync.service

# Obtain your services' status
systemctl status sync.service

# Enable the service
systemctl enable sync.service

# Stop your service
systemctl stop sync.service

# Restart your service
systemctl restart sync.service